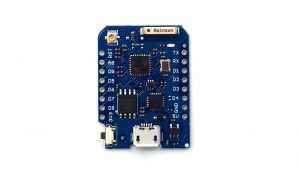
Looking to use some of these little boards within my home automation system running on Home Assistant. I’ll have some more posts on that later as I upgrade my current setup from 0.39.0 to something more recent (0.58.1 ATM).
I’ll be doing most of these from my Linux laptop, but occasionally I might work from my Windows 7 PC depending on what I’m doing. For the most part it will likely be operating system independent, except for this post at least.

Wemos D1 Mini Pro
-
-
11 digital input/output pins
-
-
-
Interrupt/pwm/I2C/one-wire
-
-
-
1 analog input(3.2V max input)
-
-
-
16M bytes(128M bit) Flash
-
-
-
External antenna connector
-
-
-
Built-in ceramic antenna
-
-
-
New CP2104 USB-TO-UART IC
-
-
Same size as D1 mini, but more light
There is great documentation around MicroPython, especially around using it on the ESP8266 chip that the Wemos D1 mini Pro is based on.
Step 1: Flashing the Chip
1.1: Download the firmware:
At the time of writing, this is the latest version: esp8266-ota-20171124-v1.9.3-49-g48f6990f
I chose to go with the Over-The-Air (OTA) firmware as the D1 mini pro has enough flash to store it and I don’t expect my programs to be very large. To do this, you need to first download the initial version. When updating use the OTA update version.
1.2: Install esptool:
This is a Python (2.7) script that will interact with the board, so if you don’t already have Python 2.7, you’ll need to install it and pip.
pip install esptool
In my case (fresh install of Linux Mint 18.1) pip needed to be installed. Python also can’t create directories with the default permissions, so I needed to run the above and the pip install command with sudo.
sudo apt install python-pipsudo pip install esptool1.3: Identify device ID:
Run the following code after plugging the board into your computer.
ls -l /dev/tty*
You should get a line back that looks something like “/dev/ttyUSB0”
1.4: Wipe the existing firmware:
sudo esptool.py -p /dev/ttyUSB0 erase_flash
This should only take a few seconds.
1.5: Flash the new firmware:
sudoesptool.py -p /dev/ttyUSB0 write_flash -fs 4MB 0 esp8266-ota-20171124-v1.9.3-49-g48f6990f.bin
This is essentially the same as the micropython docs describe, except that instead of using “-fs detect” or “–flash_size=detect”, I’m forcing it to think the flash size is 4MB. If you use “detect”, the tool will detect 16MB of flash (which is what the spec sheet confirms, see above) and proceed with that. For some reason this board does not like the 16MB of flash size and goes into a boot loop from which it can’t escape. I really have no idea why and don’t actually need all of that space, so I’m accepting my 4MB ESP8266 for now and moving on for now. For more information on this tool and what each input means, see here. Hopefully at some point in the future if I need more space I can figure out what’s going on here.
That’s it for this post, pretty lack luster I admit. Stay tuned for the next post in the series where we’ll actually do something.
Peter Merchant
Kyle