With Google semi-recently closing down their APIs for Nest products, I was starting to look for a new Thermostat. This was unfortunate since the Nest thermostat is a really nice looking piece of hardware. Fortunately someone did some sleuthing and figured out what the new APIs are and published them in an unofficial HA integration. Given the name, I doubt this will ever become an official integration, and that’s kind of the point since Nest could change their APIs at any point and leave this project defunct.
Side note, I really like the double entendre in the name, which may be unintended, but regardless it covers the fact this integration is a hack but also bad on Google/Nest for taking away one of the main reasons I chose their platform.
Anyway, for now it’s working, but it’s a little harder to set up than a normal integration. This post will cover the 2 steps to getting Badnest setup
- Installing and Configuring the Community Store
- Installing and
- Configuring Badnest
To be honest, this doesn’t really merit a blog post, everything is well documented around all 2 of these tasks, but since this Blog is mostly for me to remember what I did to get my current setup, here we are.
Home Assistant Community Store
Badnest isn’t a default part of HACS, but is packaged so that it can be included as a third party integration. If you already have HACS, skip this section, otherwise read-on.
You know what, there isn’t much of a read on. The install and configuration instructions are well documented here and here respectively. So instead I’ll just do a TL;DR: version of the install instructions in case something changes and I need to know what I did to get this working with Home Assistant version 103.3.
*Note: Just revisited this with a new install (114.4) and the process is the same, though I have made a few tweaks to address some observations in the comments.
Installing HACS
- Download HACS latest release
- unzip
- create a folder in your homeassistant config folder called “custom_components”
- drop in the “hacs” folder from step 2 into the folder created above
- Restart HA
Configuring HACS
- Create a Personal Access Token in GitHub
- add HACS from the Configuration/Integration window in HA
- Give it your token from above
- Wait a few minutes for the installation to complete
- It took 4 or 5 minutes for installation and another 20 minutes for HACs to finish starting.
Badnest
Installing Badnest
It took me a while to figure out that I needed HACS to install this, mostly because I previously had no idea what HACS was. In retrospect it is written out clearly on this community page but isn’t mentioned at all on the project page on GitHub.
- Add the GitHub page as a third party Integration to HACS from the Community/Settings page in HA. Make sure to set the Category as “Integration”
- Click the plus icon and search for badnest and click on it
- Scroll to the bottom of the pop-up and click “Install this repository in HACS”
- Click “Install”
- Restart HA
Configuring Badnest
I use Google Auth Login for nest, which is a more convoluted configuration process, but it’s all fairly straight forward. If you don’t use GAL, skip this section.
Getting the token and cookie for Google Auth Login
This is really well documented on the GitHub page, the only trick is if the file you’re told to shows up more than once, always grab the most recent copy (lowest in the list). The following is lifted verbatim from the project page:
- Open a Chrome browser tab in Incognito Mode (or clear your cache).
- Open Developer Tools (View/Developer/Developer Tools).
- Click on ‘Network’ tab. Make sure ‘Preserve Log’ is checked.
- In the ‘Filter’ box, enter
issueToken - Go to
home.nest.com, and click ‘Sign in with Google’. Log into your account. - One network call (beginning with
iframerpc) will appear in the Dev Tools window. Click on it. - In the Headers tab, under General, copy the entire
Request URL(beginning withhttps://accounts.google.com, ending withnest.com). This is your"issue_token"inconfiguration.yaml. - In the ‘Filter’ box, enter
oauth2/iframe - Several network calls will appear in the Dev Tools window. Click on the last
iframecall. - In the Headers tab, under Request Headers, copy the entire
cookie. When I originally tried this integration, the cookie did begin with “OCAK=” like the official instructiosn say. This time around it started with “__Secure-3PSID=”. I think it’s save to say copy everything that appears after the “cookie:” section. This is your"cookie"inconfiguration.yaml.
Configuration in HA
without GAL:
badnest:
  email: email@domain.com
  access_token: !secret nest_access_token
  region: us

climate:
  - platform: badnest
    scan_interval: 10

camera:
  - platform: badnest

sensor:
  - platform: badnest
with GAL:
badnest:
  issue_token: "https://accounts.google.com/o/oauth2/iframerpc....."
  cookie: "XXXX=......"
  region: us

climate:
  - platform: badnest
    scan_interval: 10

camera:
  - platform: badnest

sensor:
- platform: badnest- Note the quotation marks around the token and cookie
- Probably a good idea to keep these in your secrets.yaml file
Summary
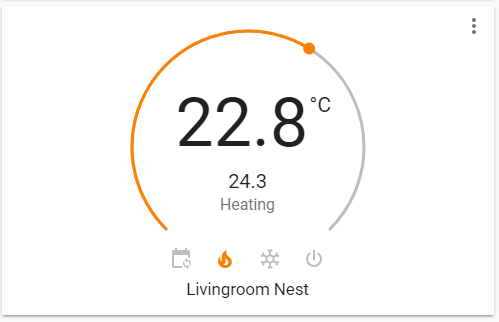
That’s it, you can now add a climate card to your lovelace page to view your Nest settings and change them.

The only part that isn’t ideal is that there doesn’t seem to be a way to set whether you’re “Home” or “Away”, but considering this is a hack to get it working at all, I can’t complain. A huge shout out to USA-RedDragon for making this possible again!
Frederic
Lsdigi
Kyle
Jeremy
Kyle
Alessandro Buffardi
Kyle
Sean
Kyle
Thibaut Lamadon
Thibaut Lamadon
Adam
Kyle
Tyler
Supported
Nardol