The title of this makes it sound like this is a guide, for that I apologize. This is my attempt at logging where my home lab started with the intent of hopefully looking back from some point in the future and shaking my head at what a colossal noob I was.
This isn’t technically my first home lab, but since they weren’t documented, they don’t really count. Besides, they were barely even half baked, whereas what I’m scheming at now is at least 75% baked.
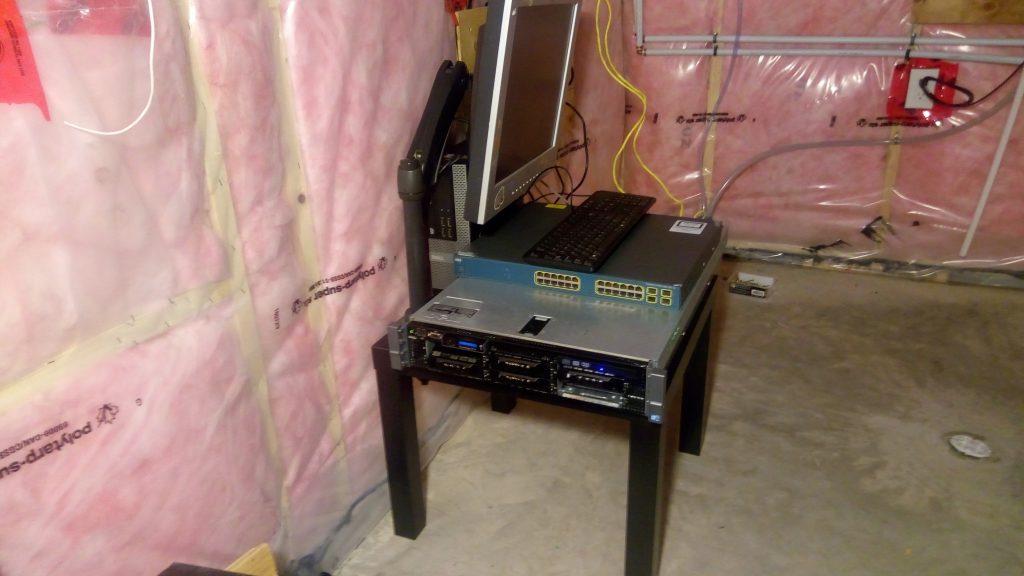
Server – As purchased:
R710 Gen II
- 4Gb Ram
- 2 E5620 CPUs
- Perc 6i Raid Controller
- 2 870W PSUs
- 0 HDD
- 1 DVD Drive
Server – After upgrades:
R710 Gen II
- 52Gb Ram
- 2 E5620 CPUs
- Perc H200 Raid Controller
- flashed to IT mode to run as HBA (Host Bus Adapter)
- 2 870W PSUs
- 2 3 Tb HDDs
- 1 200 Gb SSD
Flashing the H200 to IT mode was by far the worst part, and it was mostly just anxiety about bricking the CCA as the process didn’t turn out to be that bad. I mostly followed this guide, but with a few (not entirely intentional) alterations. See this micro blog post.
My end goal (which I actually succeeded in, surprisingly) was to get Proxmox installed on the SSH, with FreeNAS running as a virtual machine (VM) to act a NAS for my whole network without taking all of the servers resources. To do this I needed to give FreeNAS control of the hard drives which is why I needed the H200 to be in IT mode, or acting as an HBA. See this micro blog post for giving FreeNAS the H200 (passing the PCIe port through Proxmox to the VM hosting FreeNAS)/
Currently I have a slew of VMs running on Promox along side FreeNAS:
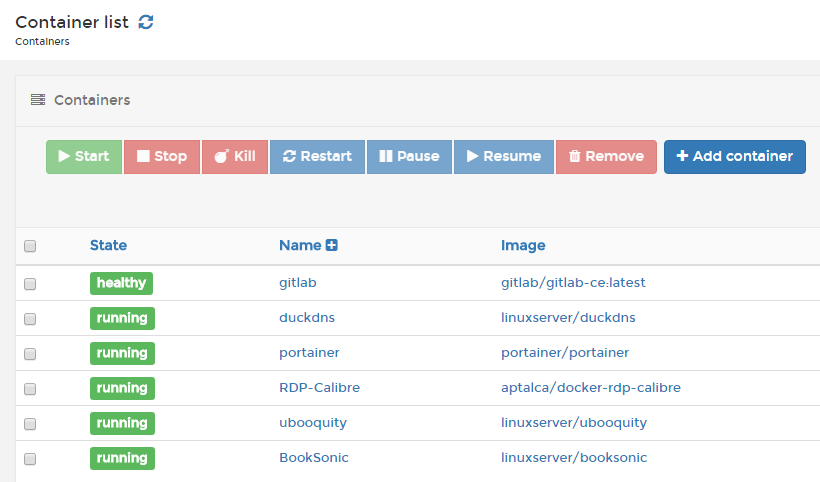
Plex runs on it’s own VM, as does Pi Hole. The rest run in a single VM that I spun up to act as a docker host. Portainer is especially useful here as I can get a single view of all of the docker containers from a single site:
It’s probably worth mentioning that all of my VMs are based on Linux Mint 18.1, at least for now. This is mostly because that’s what I’m familiar with and it makes things consistent for me. A Debian or Ubuntu base would have also worked and probably functioned identically.
The docker containers are a super slick way to get a new system up and running with almost no effort. I plan to document how I set them up with another post. When that’s done, I’ll add a link.
Well that was a lot of useless information that no one is ever going to read. Next up is the stuff that I’ve purchased but not yet set up:
In Work:
Router :
Cicso C3560G
- WS-C3560G-24PS-S
- Gigabit router
- 24 Ports
- POE ports
- LOUD!
WiFi:
Ubiquiti UniFi AP AC Lite
- To be mounted to my ceiling and connected via a cable run from my basement to my attic.
- a VM running the software will be spun up to control the AP.
Modem:
Dell Optiplex 7010
- Planning to run Proxmox on this as well with a VM for PF Sense to act as the Modem
- 4 Port Gigabit Ethernet Adapter
- To be passed through to PF Sense
That’s pretty much it that I have completed and lined up. I have a lot on the go, but hopefully the Home Lab will continue to evolve along with the other projects.
75% baked home lab
find router ip address
Sannywot