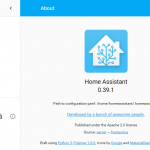
As I mentioned previously, I have Home Assistant already setup and working, but it’s horribly out of date (0.39.1). Rather than mess with trying to update it to the latest via an update, I’m going to start fresh on a different Pi3. that way I can get everything set up how I want, and then just switch the SD cards. Hopefully this method will reduce downtime as I know there are breaking changing between my current version and the newest version (currently 0.58.1).
This wasn’t a complicated set up for the most part, in that it didn’t do a lot, but there were some unique features that I’ll need to figure out with the new tools built into HA that weren’t available when I first made them. The main part that I need to get working is my door chime. When any of the doors open, it plays a chime. This was accomplished by connecting my wired door sensors to the GPIOs of the Pi and setting them up as binary sensors, and a speaker that is plugged into the Pi’s aux port. I’ll do another post on this physical set up in the future.
-

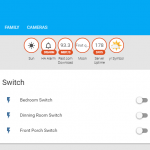
- Home Page
-
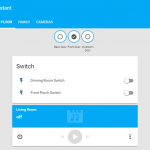
- Main Floor Group
-
- Legacy About Page
Getting Started:
I really want to like HASS.io, but it’s far too limited at the moment if you want to do a lot of tweaking. If you aren’t looking to do a lot of tweaking, HASS.io is a fantastic way to get started. For now I’m doing my fresh install with Hassbian and following the instructions straight from home-assistant which is super simple:
- Download the latest Hassbian image
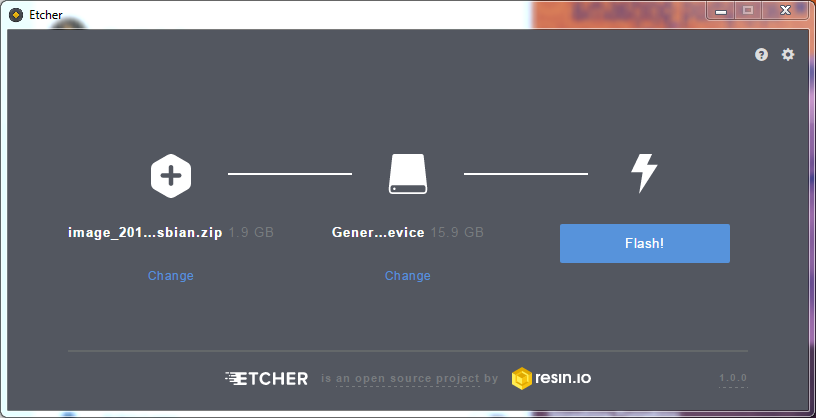
- Download and install Etcher
- Plug in your SD card and open Etcher
- Select your Hassbian image and your SD card and hit “Flash!”
Etcher flashing Hassbian
- Wait for it to finish flashing and validating (~5 minutes)
- Plug the SD card into the Pi and plug it in to ethernet and power
- Wait ~5 minutes for Hassbian to set up HA
Now you should have a Home Assistant instance set up and waiting, but presumably you don’t know what your Pi’s IP address is. There are a few ways to get it, I prefer to log into my router and find the IP address associated with the host-name hassbian, but that’s because I usually have my Pi running headless (no monitor).

Otherwise you’ll need a keyboard and monitor plugged into your Pi so that you can log in (user: pi, password: raspberry) and enter the following into the terminal.
ifconfig
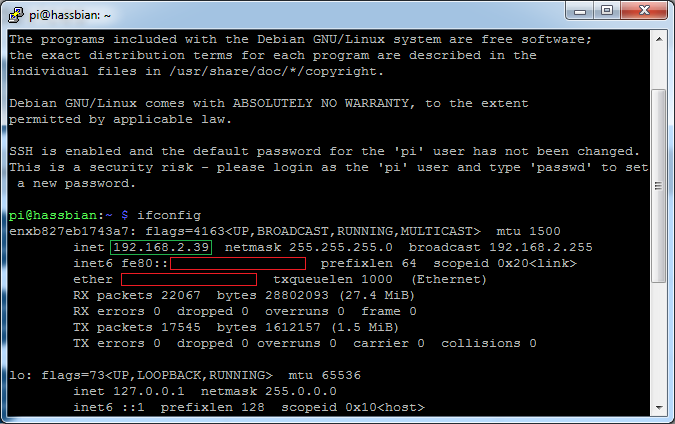
Output from running the ifconfig command, IP address highlighted with green box
So now that I know my IP address, I can enter the address following by the HA port (8123) into my web browser.
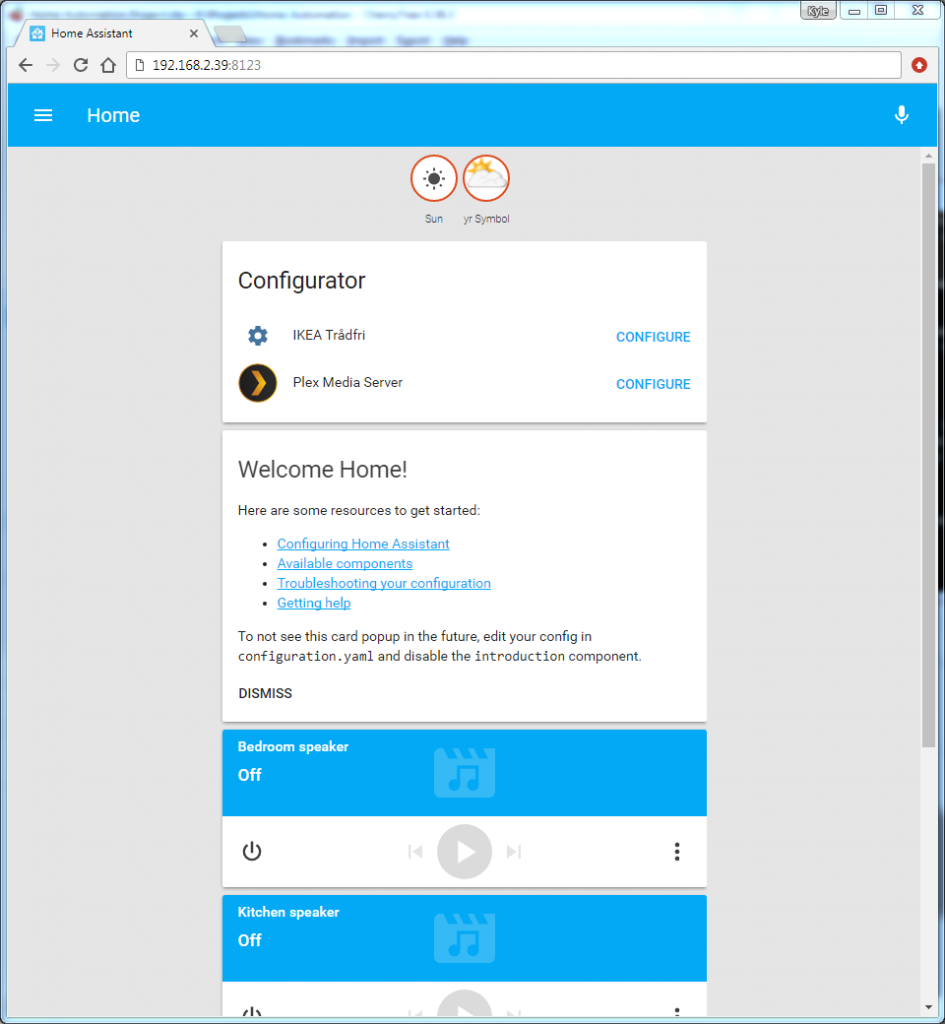
And that’s pretty much it for initial set up. You can see above that it automatically found some stuff on my network:
- Plex Server
- Ikea smartlight
- 2 Google Home Minis
- 2 Chromecasts (not actually seen above)
The Chromecasts and Homes are automatically fully set up, the Plex server and Ikea lights need to be configured though.
Ikea Lights
For the Ikea lights, this is as simple as clicking “Configure” and entering the serial number on your hub. After that it goes and finds everything linked to that hub:
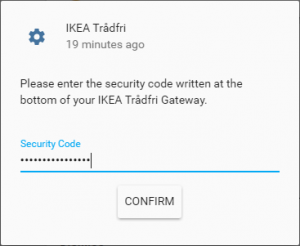
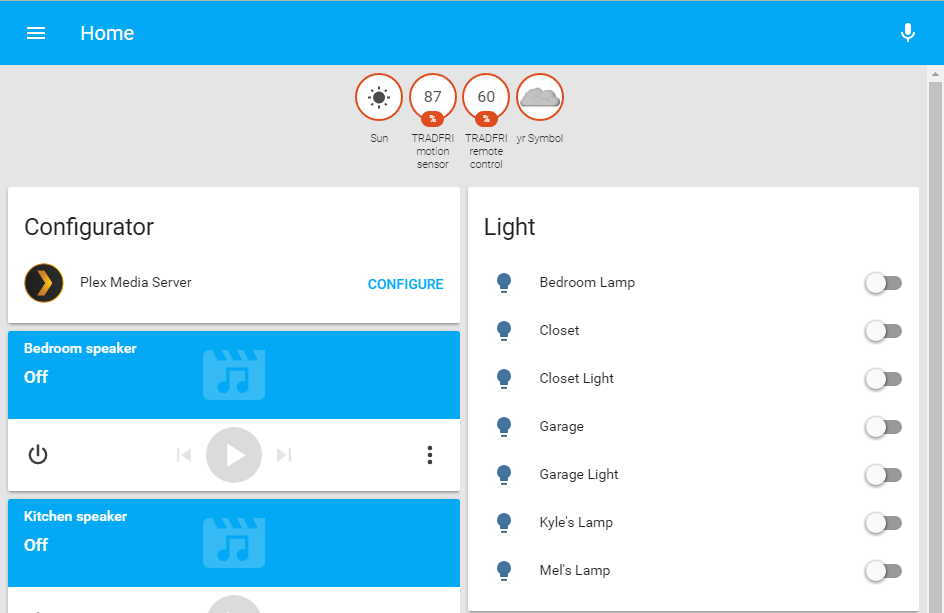
Now I can see and interact with my Ikea lights from around the house.
Plex
For Plex it’s in theory as simple doing the exact same thing, but I seem to be struggling.
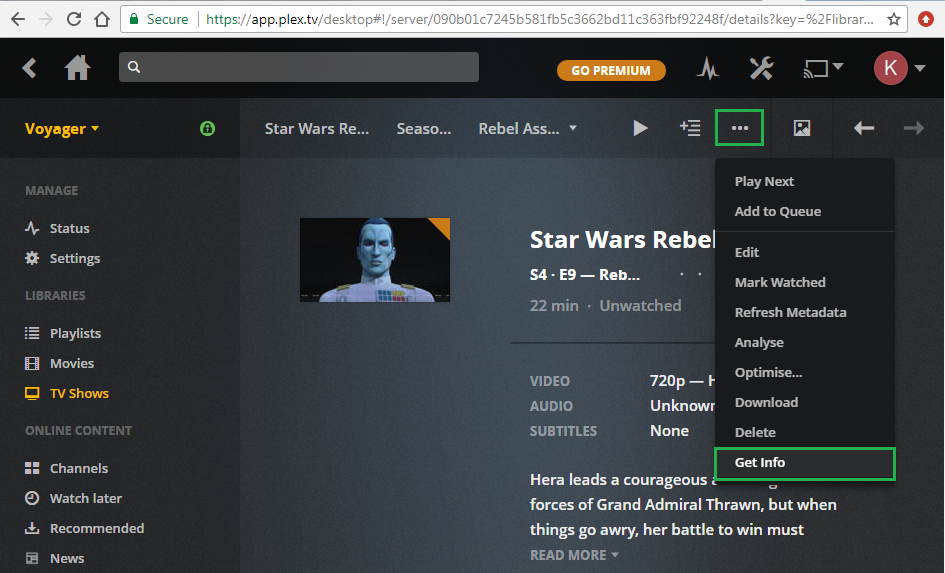
To get the token, you need to go to your Plex interface and go to a specific episode or movie. From here click on the three dots menu and “Get Info”
From here, click “View XML”
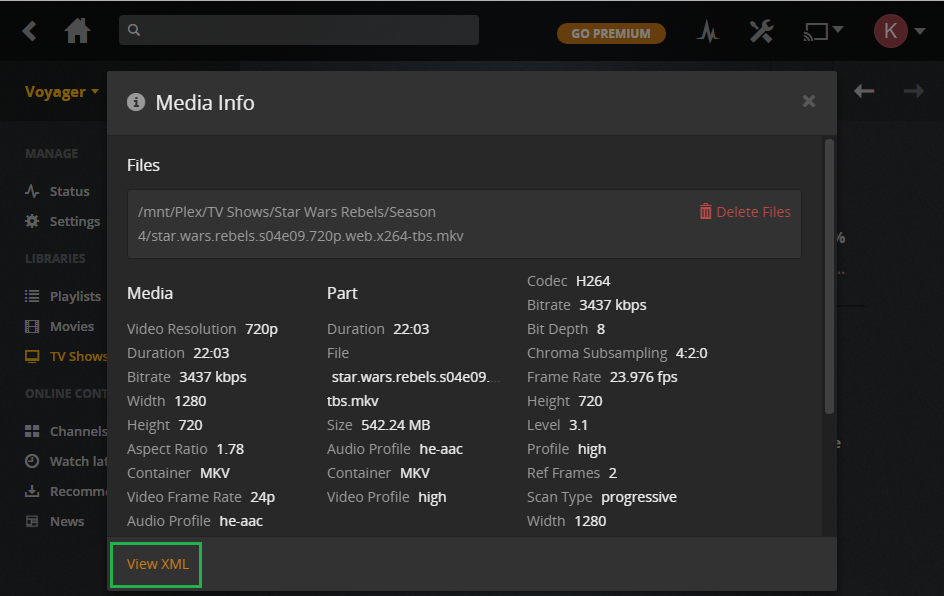
It will open up an XML file in your browser. Look in the address bar for the following and copy just the token which is found after the “Plex-Token=” string.
![]()
Put that token in the configurator and hit “Confirm”
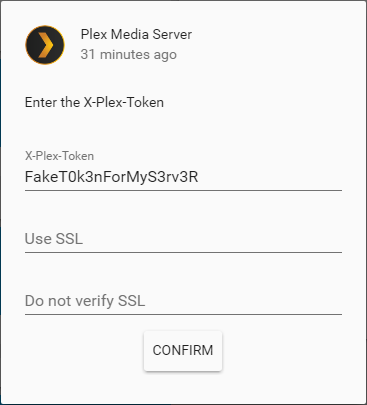
For me, nothing happened. It started doing stuff and then stopped and stayed at the same screen. I’ve had this working in previous instances of HA and never really liked it, so I’m not going to bother debugging it further at this time. If I get it working, it’ll be in another post. I’ll update this with a link when/if that happens.
*Edit – I was working on something else and the Plex configurator popped back up. Put in the token and this time it worked. No idea why, but my point still stands that this component isn’t super useful.*
Wrapping Up
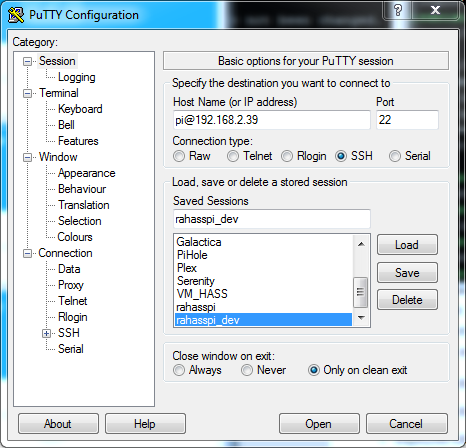
The last thing that is really important not to forget to do is the change the password to the Pi. You can do this from a monitor and keyboard directly on the Pi, or SSH into the Pi from your other PC. By default on Hassbian, SSH is configured so all you need is your IP address, user name and password. I’m currently doing this setup from my gaming PC, so I’m using Putty.
You can either put your username@IP-address in for the host, or just the IP address. I prefer to put both so I don’t need to remember the username on multiple devices.
After hitting “Open” a terminal window will pop up and ask you for your password. Enter “raspberry” and hit enter and you’ll be at the same screen you would be at if you were actually sitting in front of the pi with a monitor and keyboard.
From here enter the command passwd and you’ll be asked to confirm the current password before entering a new password twice:
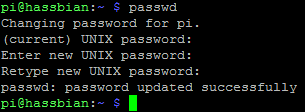
That’s it for now, we have a fresh install of Home Assistant 0.58.1 with a few things already configured. Next time I’ll be setting up Z-Wave devices which will require me to take them offline for the legacy set up. Currently these devices turn my porch lights on and off based on when the sun will set or rise, so I’ll be adding a few automations at the same time.