Z-Wave
Configuration
The first step to transitioning to my new HA instance is to configure Z-Wave for my smart switches. My Z-Wave network consists of the following
- Aeotec Z-Stick (Gen 5)
- 3 Homeseer WS100+ Switches
- 1 Homeseer WA100PLUS Addon Switch (used with the above for a 3-way switch setup)
The Z-Stick is already paired to the switches, so I won’t be covering that here but here is a link to a how-t0.
From our fresh install of HA, configuring Z-Wave is super easy as all of the dependencies are already installed. Simply add 2 lines to your configuration.yaml file and restart HA.
z-wave:
usb_path: /dev/ttyACM0
The usb path should be the same if you’re using a Pi3, but to confirm enter the following line into the terminal:
ls -ltr /dev/tty*|tail -n 1
![]()
To get to the configuration file, we need to change directories by entering the following into the terminal.
cd /home/homeassistant/.homeassistant
Now to edit the configuration.yaml file, we’ll use nano:
sudo nano configuration.yaml
After this, we’ll be presented with the contents of this file in the terminal:
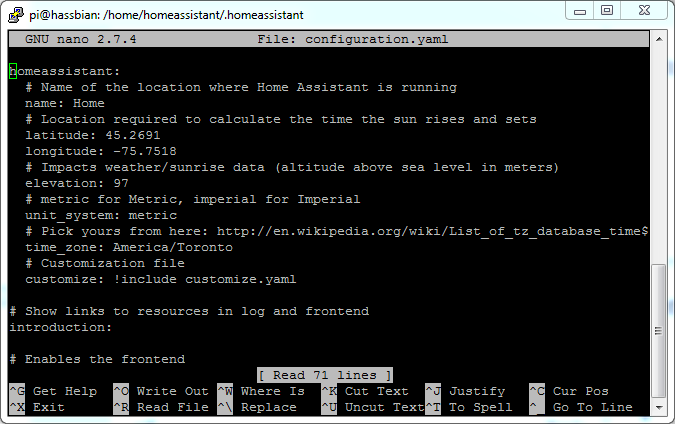
Arrow or Page Down to the very bottom and add the following:
z-wave:
usb_path: /dev/ttyACM0

Now restart HA with the following command:
sudo systemctl restart home-assistant@homeassistant.service
Or try from the GUI, but I find this often fails for no perceivable reason.
After HA restarts, it should only take a few minutes for everything that is paired to your Z-Stick to show up on the home page.
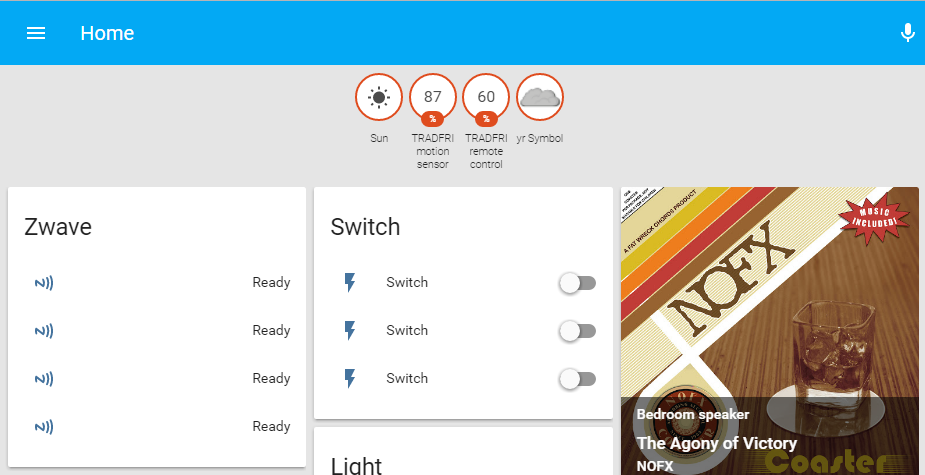
Two sections are added, Zwave and Switch. If you have other types of zwave devices, there would be more sections added. The Zwave section is a list of all Z-Wave devices on my network. The Switch section is obviously a list of the switches on my network. Right now this Switch section isn’t entirely useful without proper names. However, if you restart HA again, it should figure out at least what each device is:

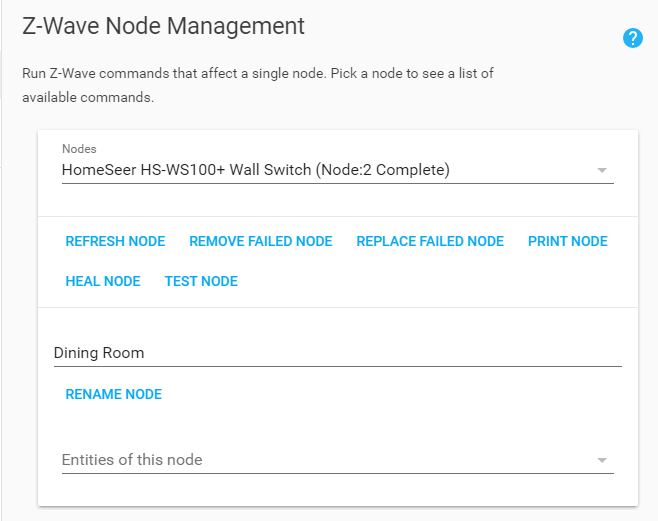
Still not super helpful, but at l;east we know what Z-Wave device is the Z-Stick versus the 3 switches. Click on the first switch and it will bring up a window with more info.
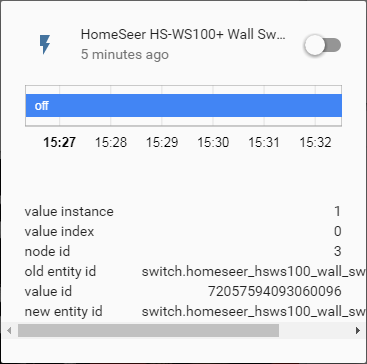
This first switch is node 3. Turn it on and make note of what light comes on. Turn it off and repeat for each switch. Now that I know what each switch is, I can rename them accordingly.
| Node | Alias |
| 2 | front porch |
| 3 | dining room |
| 4 | master bedroom |
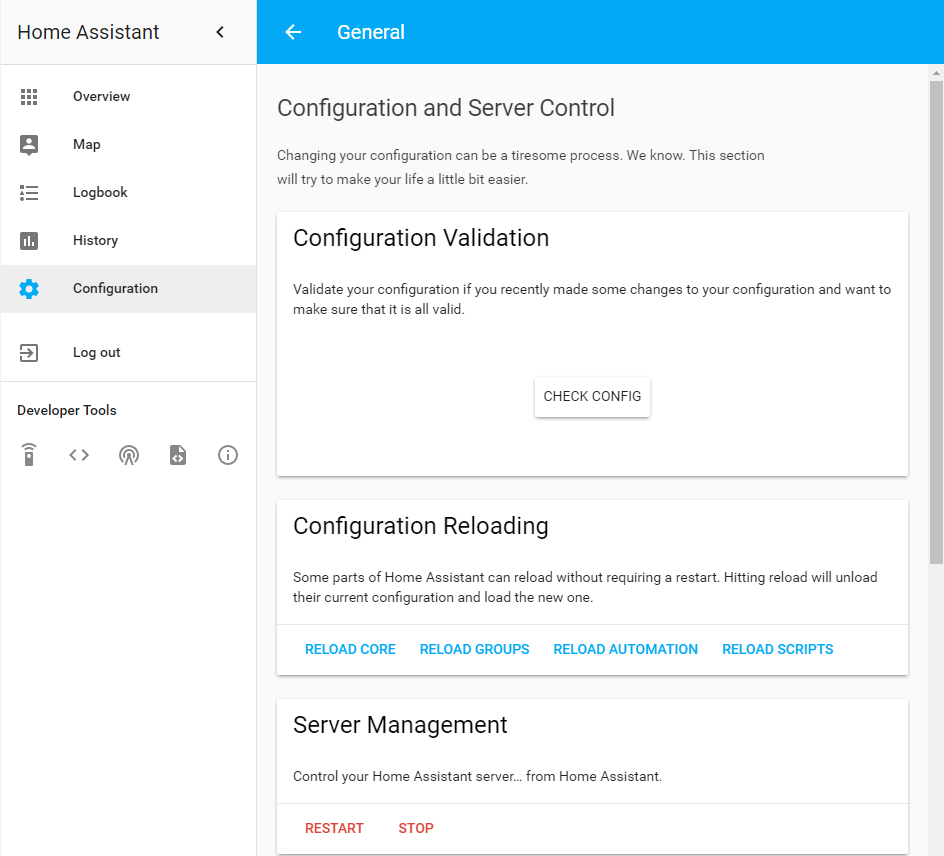
Go to the Configuration tab from the side bar and click on “Z-Wave” to bring up the Z-Wave Manager:
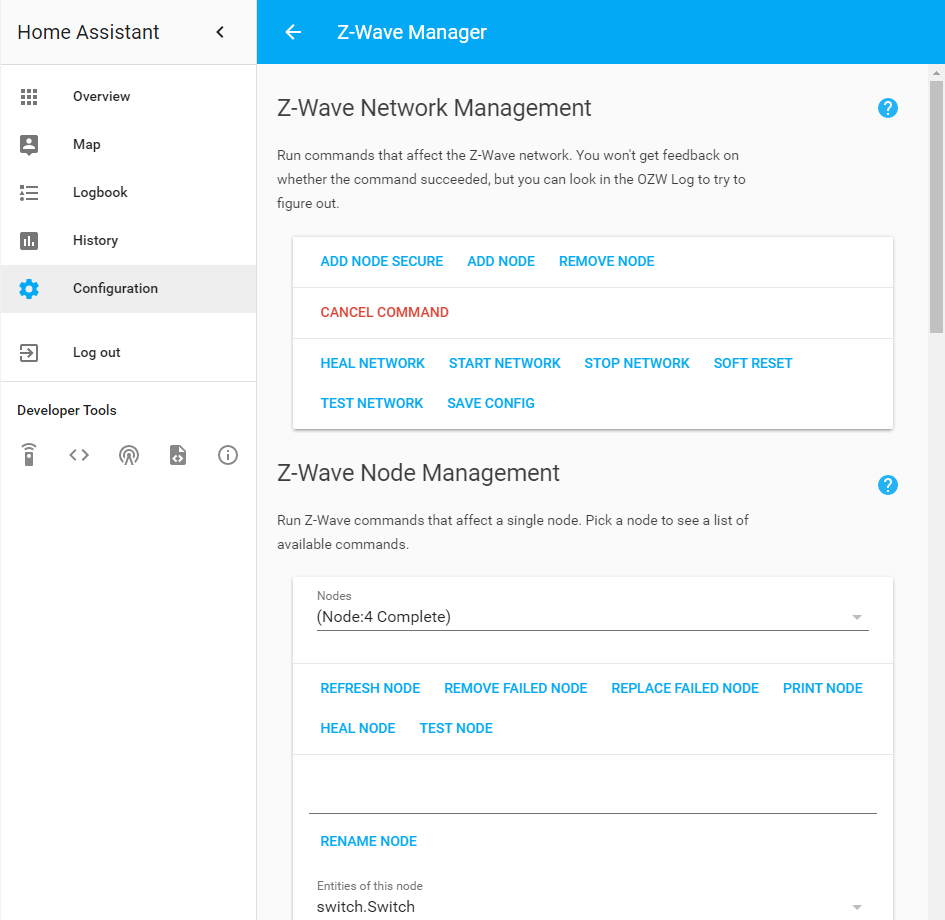
We need to go into each node, assign it a name, and click on “rename node”:
Repeat this for all switches and then restart HA again.
Now assuming you want HA to know when these switches are flipped manually, we also need to add in a polling intensity, I chose 1 as I want every switch updated each time the Z-Stick cycles through each node. If you have a lot of devices in your network, you may want to choose a different value depending on what the device is.
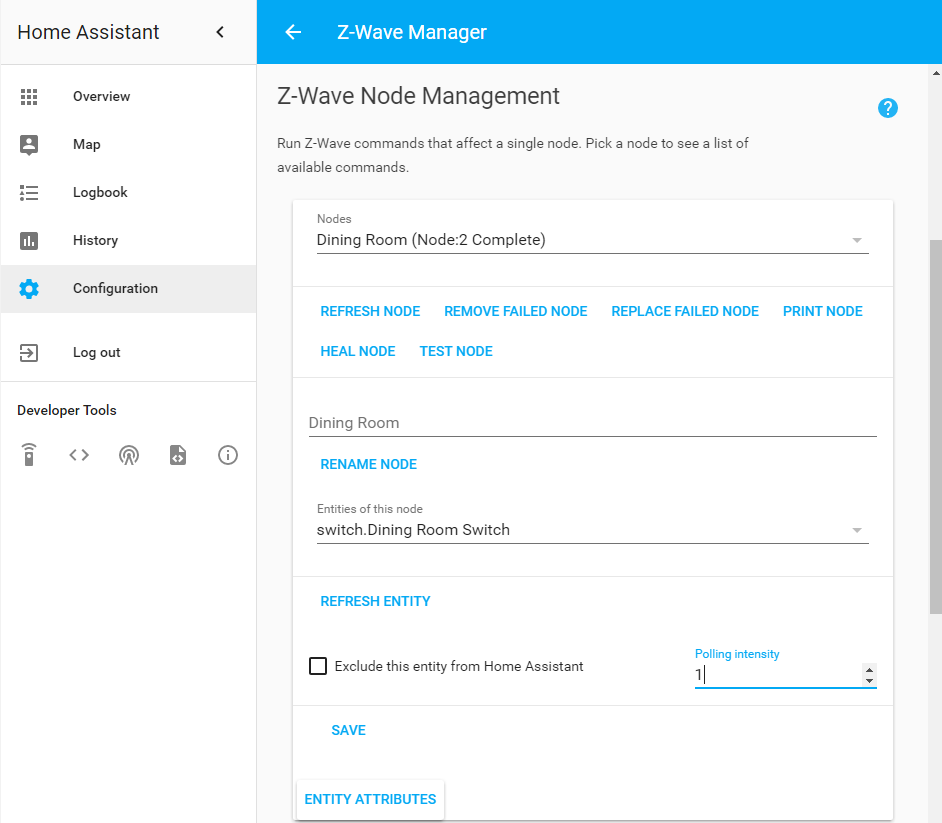
Do this for each switch and again restart HA. It seems to take about 30 seconds for HA to recognize that the switches state has changed. These switches specifically are supposed to be able to push updates, but I can’t seem to find a way to make use of that. For now, 30 second delay is good enough. When/if I figure it out, I’ll link to it from here.
Groups
Before we get to automations, I want to create a group for the switches on the main level of the house as that’s what I want my automation to trigger. There is already a groups.yaml file in the main HA directory, so all we need to do is add a few lines:
mainfloor:
view: yes
name: Main Floor
entities:
- switch.front_porch_switch
- switch.dining_room_switch
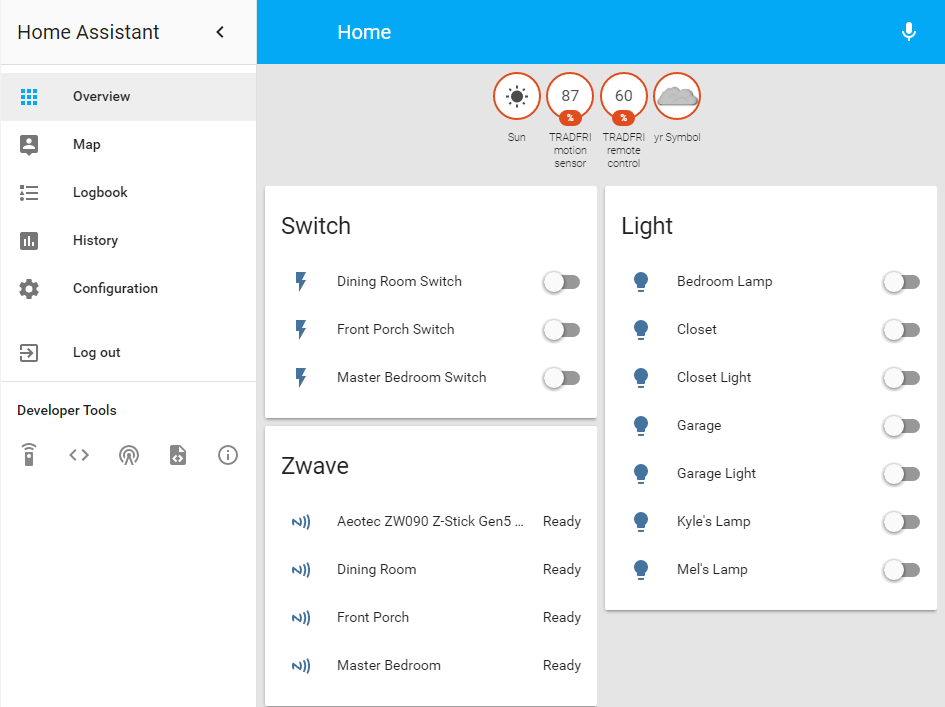
Restart HA and we have a new tab beside “Home” with our two switches that are on the main level:
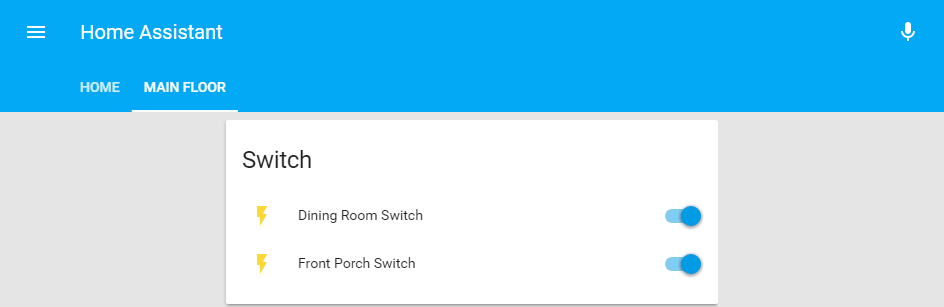
It’s worth noting that anything can go in this group. I’ll eventually add the Google Home Mini and Chromecast that are on that floor as well as some other lights and sensors.
Automations
This is the automation.yaml file from my legacy setup, it is not compatible with the new instance of HA.
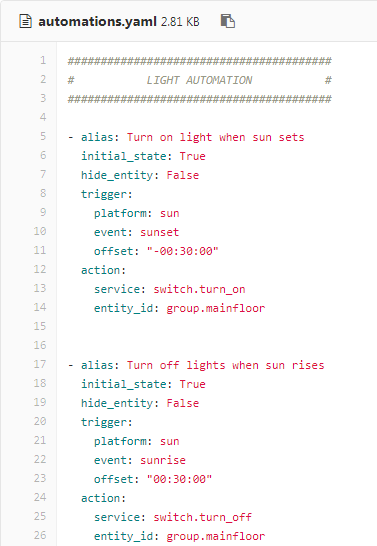
The main difference is the addition of an “id” component and the alias needs to be in quotation marks now. So I’ll add the following to my automation.yaml file
########################################
# LIGHT AUTOMATION #
########################################
- id: sunset_lights_automation
alias: "Turn on light when sun sets"
initial_state: True
hide_entity: False
trigger:
platform: sun
event: sunset
offset: "-00:30:00"
action:
service: switch.turn_on
entity_id: group.mainfloor
- id: sunrise_lights_automation
alias: "Turn off lights when sun rises"
initial_state: True
hide_entity: False
trigger:
platform: sun
event: sunrise
offset: "00:30:00"
action:
service: switch.turn_off
entity_id: group.mainfloor
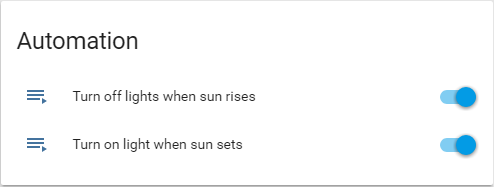
Note that the entity_id that I’m calling is group.mainfloor, but the service that calls it is specific to switches, so it won’t affect anything else in the group except switches. Once HA is restarted the automations will show up on the home page:
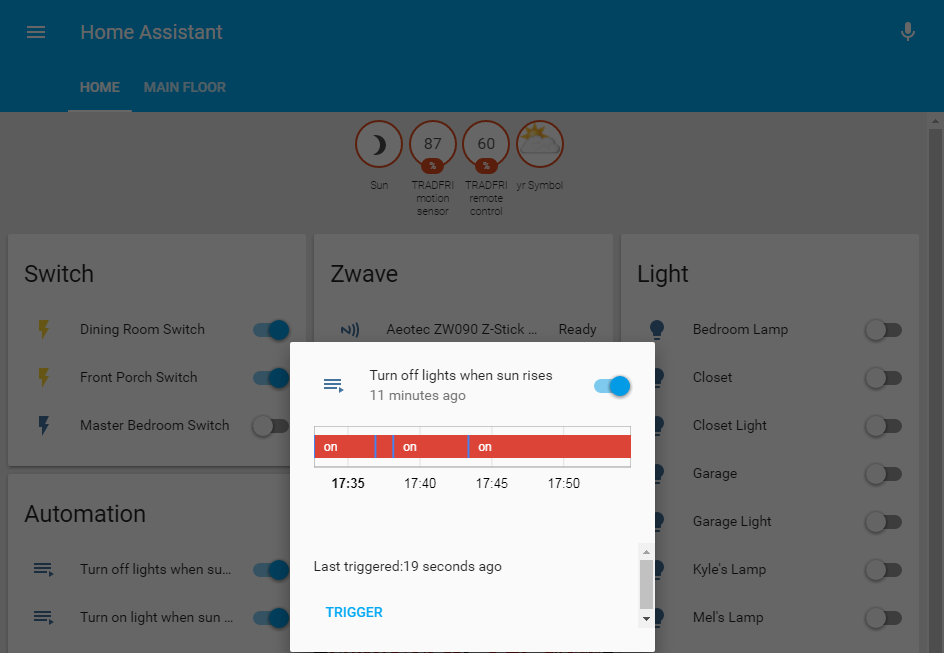
Rather than wait for the sun to set or rise, you can click on each automation to bring up a menu and manually trigger them to ensure they’re doing what you want:
Next time I’ll be cleaning up the interface a bit, like adding more groups and fixing the home page so that it doesn’t show everything automatically.
Abdulrahman BnSultan
Kyle