The last post ended with me setting up a z-wave switch with the intention of using it to control the power of my 3D printer, so that’s what I’ll cover here. I’ll also set up another Pi with Octoprint so that I can send gcode to the printer remotely.
Home Assistant – Z-wave Switch with 3D Printer
To keep everything related to the 3D printer together, I’ll add a new view to the home page by adding the following to groups.yaml:
octoprint:
view: yes
name: Octoprint
entities:
- group.3d_printer_power_card
3d_printer_power_card:
view: no
name: Power Consumption
entities:
- sensor.3d_printer_current
- sensor.3d_printer_energy
- sensor.3d_printer_power
- sensor.3d_printer_previous_reading
- sensor.3d_printer_voltage
- switch.3d_printer_switch
I got these sensor names from the Developer Tools – State page. I wanted to keep all of the power related sensors together so I made a dedicated card for them.

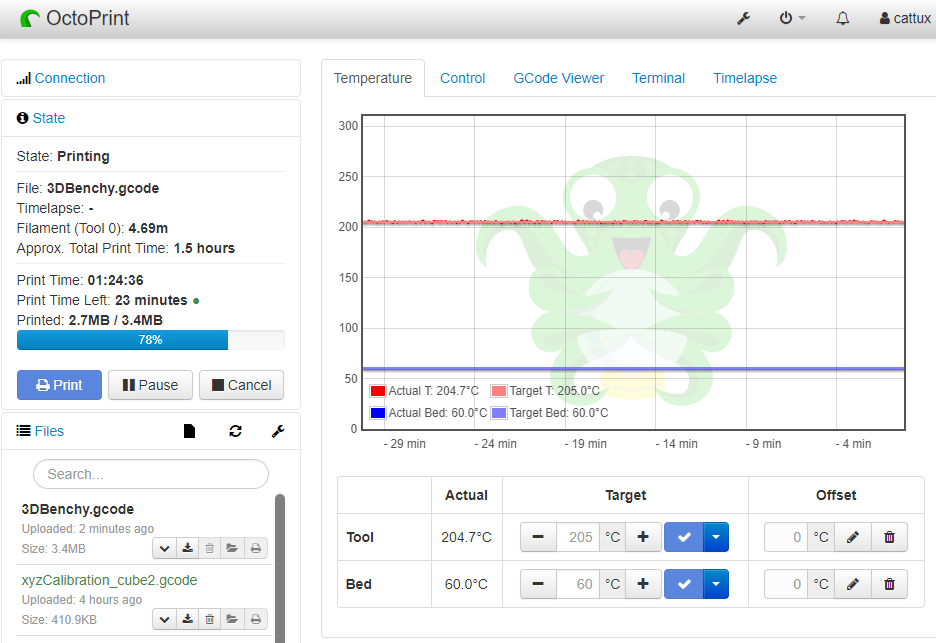
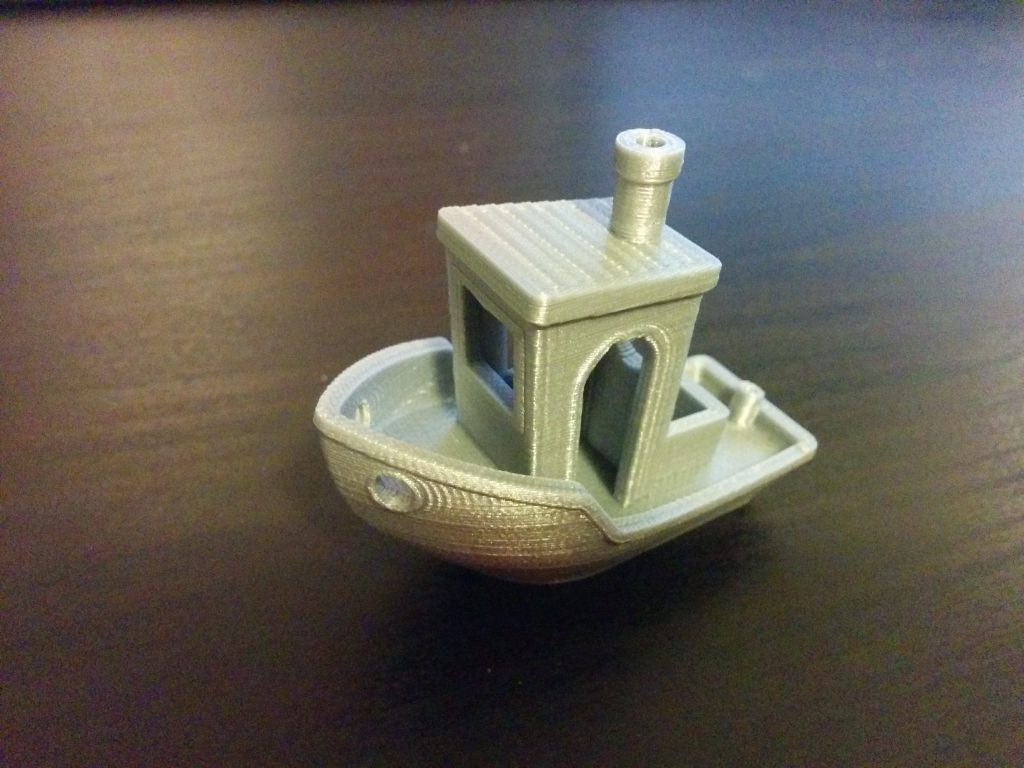
I have a 3DBenchy printing right now as a test and it seems that current isn’t working, but everything else seems to be playing nicely. Hopefully I can figure out why later, but for now it’s good enough.
OctoPi Setup
The easier way to get OctoPrint running is to download the image made for the Pi and flash it with Etcher. I’m plugging an Ethernet cable into my Pi for network access, but if you want to use WiFi, follow the instructions on the download page for setting that up. If you’re plugging it in, you don’t need to do anything.
Power the Pi and once it’s booted, either log into your router to get the IP address or plug in a monitor and keyboard and run the command “ifconfig” as I explained in my getting started with HA post.
Once you have the IP address, type it into the address bar and be greeted with a log in screen. You don’t have credentials yet, so just type in anything and it will take you to a set up page where you set them up.
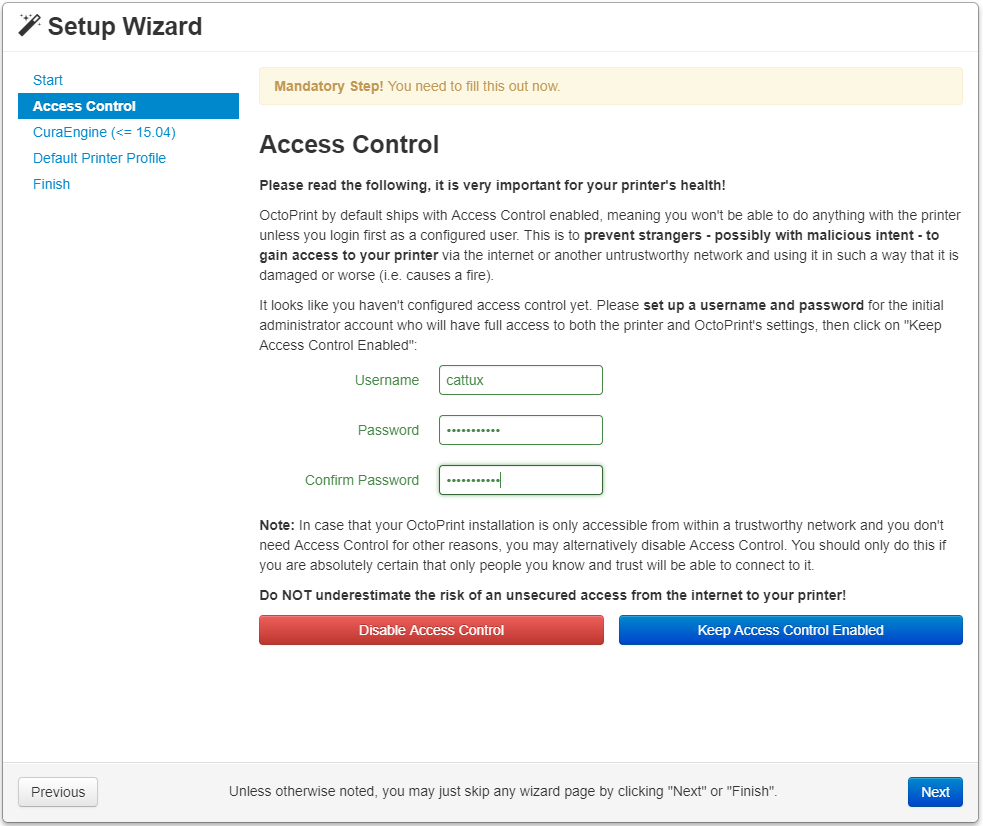
Other than that, I also had to specify my bedside. It defaulted to 200 x 200 x 200mm, but my Z axis is limited to 180mm so I changed that.
There are a few more questions, but nothing too complicated.
Home Assistant – Octoprint Component
Before we can monitor any sensors on the printer, we need to add the base component to the configuration.yaml file. This on it’s own won’t actually let you see or do anything, so don’t be alarmed if HA restarts and doesn’t have any new sensors or anything.
octoprint:
host: 192.168.2.31
api_key: !secret octoprint
bed: True
number_of_tools: 1
Use the IP address found above for the ‘host’. The api_key can be found in the settings under the API tab. I have a heated bed, so I set bed to True and I only have 1 extruder, so tools was set to 1.
There are two components separate from the above that you can add to get sensor info, you might as well add both and use them as you please. They both get added to the configuration.yaml file, 1 under sensors and the other under binary_sensors:
sensor:
- platform: yr
- platform: uptime
- platform: moon
- platform: plex
host: 192.168.2.28
token: !secret plex_token
- platform: octoprint
name: OctoPrint
monitored_conditions:
- Current State
- Temperatures
- Job Percentage
binary_sensor:
- platform: rpi_gpio
ports:
14: Mudroom Door
15: Front Door
18: Back Door
- platform: octoprint
monitored_conditions:
- Printing
- Printing Error
Now restart HA and under the Developer Tools – State page you can get their entity_ids and either add them to their own group or the Octoprint tab in the groups.yaml file. I did a bit of both:
octoprint:
view: yes
name: Octoprint
entities:
- sensor.octoprint_job_percentage
- sensor.octoprint_current_state
- binary_sensor.octoprint_printing
- binary_sensor.octoprint_printing_error
- group.3d_printer_power_card
- group.3d_printer_temp_card
3d_printer_temp_card:
view: no
name: Temperatures
entities:
- sensor.octoprint_actual_bed_temp
- sensor.octoprint_actual_tool0_temp
- sensor.octoprint_target_bed_temp
- sensor.octoprint_target_tool0_temp
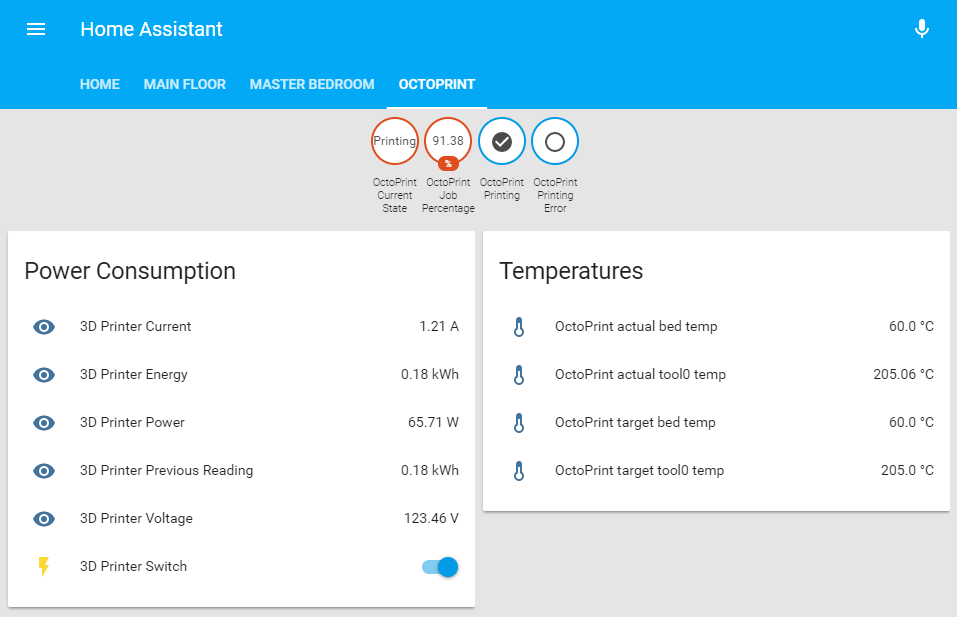
Right now I still have to monitor the print and turn off the printer when it’s done. However, with this sensor information, I should be able to automate the shutdown upon print finishing.
Automation
Once the print finishes, the “Print Job Percentage” goes to 100%, so I could set an automation to wait for that and then turn off the switch. In practice it’s not a great idea to power off the printer while it’s still hot. I could guess how long it would take to cool down and just add a delay, but that isn’t a nice elegant solution. Instead I could wait for the actual tool0 temperature to get below 30°C, and if the print job percentage is also 100%, then shut down the printer. That way I know the tool got properly cooled down and it won’t shut off on me while I’m leveling the bed or cancelling a job and getting another one set up because the print percentage isn’t at 100%.
- id: 3d_printer_finished
alias: 3D Printer Job Complete
initial_state: True
trigger:
- platform: template
value_template: "{% if states.sensor.octoprint_actual_tool0_temp.state | float < 30%} true {% endif %}"
condition:
- condition: state
entity_id: sensor.octoprint_job_percentage
state: '100'
action:
- service: switch.turn_off
data:
entity_id: switch.3d_printer_switch
This doesn’t really matter, but I don’t like the default names of the temperature sensors, so I renamed them in the customize.yaml file:
sensor.octoprint_actual_tool0_temp:
friendly_name: Extruder Actual Temp
sensor.octoprint_target_tool0_temp:
friendly_name: Extruder Target Temp
sensor.octoprint_actual_bed_temp:
friendly_name: Bed Actual Temp
sensor.octoprint_target_bed_temp:
friendly_name: Bed Target Temp
sensor.octoprint_job_percentage:
friendly_name: Print Job Percentage
I also don’t like the order they’re listed in, so I updated the order they’re listed in the groups.yaml file:
3d_printer_temp_card:
view: no
name: Temperatures
entities:
- sensor.octoprint_actual_bed_temp
- sensor.octoprint_target_bed_temp
- sensor.octoprint_actual_tool0_temp
- sensor.octoprint_target_tool0_temp
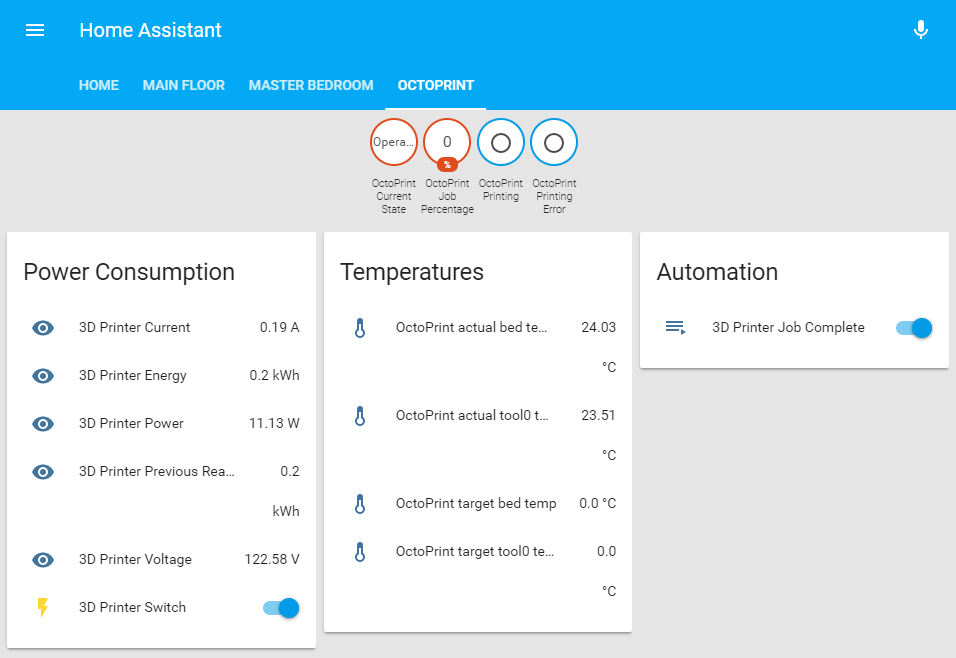
Restart HA and now the extruder actual and target temperatures are grouped together and same for the bed temperatures. The “°C” was also getting pushed to the next line before and isn’t now, so that’s another bonus of customizing the names:
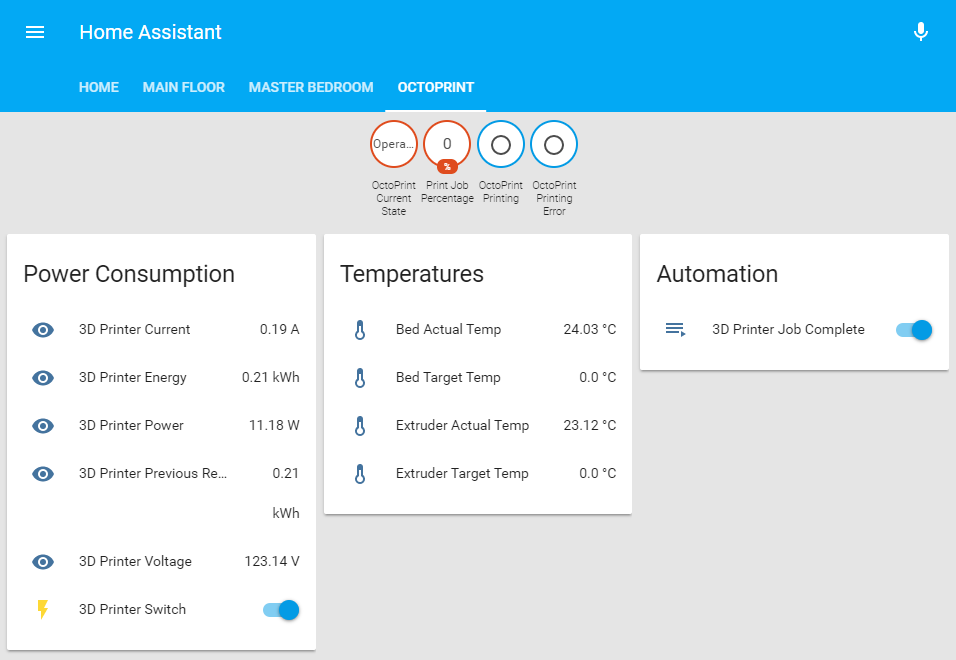
Before I wrap this up, there’s one last issue that I want to address. While I was setting up a final print to test the shutdown automation I was in the basement looking at HA from my phone:
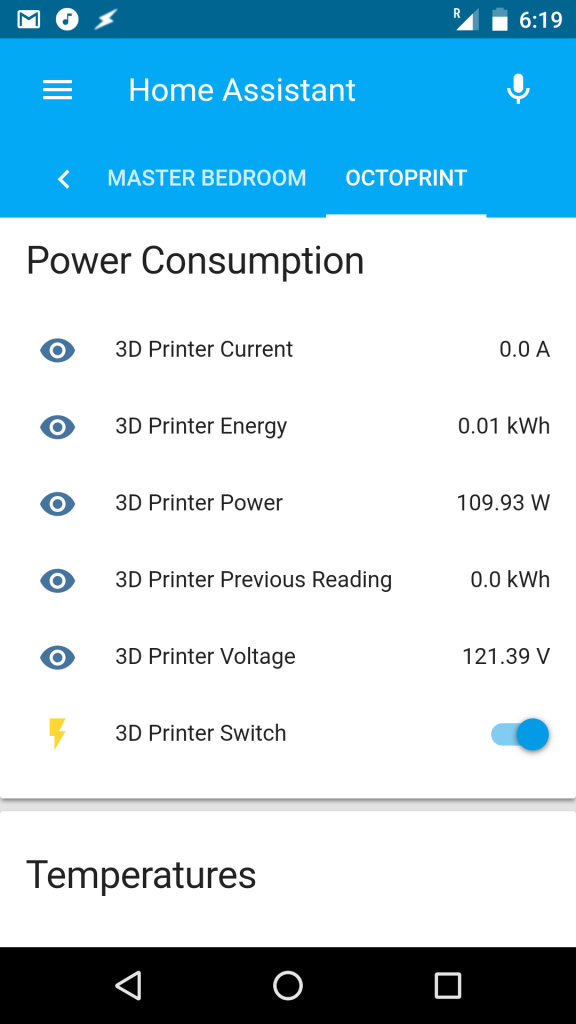
It’s not a huge deal, but I really don’t like having to scroll across the tabs at the top to go between the Home tab and the Octoprint tab. Luckily we can change these tabs from text to icons in the group.yaml file:
default_view:
view: yes
icon: mdi:home
entities:
- sun.sun
- sensor.yr_symbol
- group.main_level_card
- group.master_bedroom_card
- sensor.uptime
- sensor.moon
- updater.updater
- group.door_card
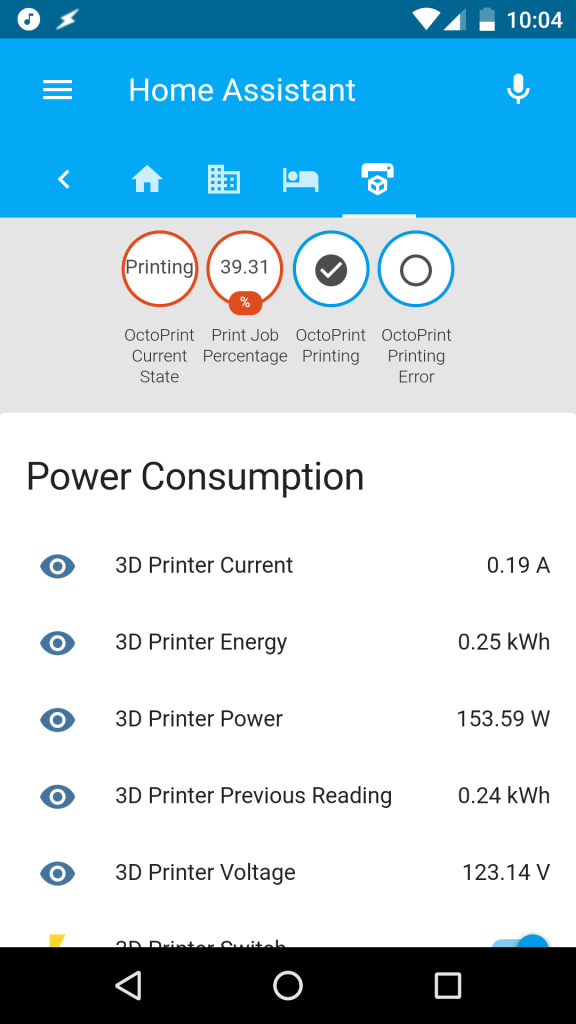
The icons are pulled from here. You can search the database for something specific, like printer, and find an icon called “printer-3d”. That’s what I used for Octoprint shown below:
Here’s my benchy that I printed while working this out, that’s it for now!
Robert Rollins
Paul
Omelette
dajosco